
My first headboard was a $40 sheet of plywood, a can of paint, and the confidence of someone who had never used a stud finder.
I leaned it against the wall, congratulated myself, and woke up the next morning with the whole thing having slid sideways onto my pillow. The design was fine. The plan for actually holding it up was the missing piece.
If you’re searching for DIY headboard ideas you can realistically finish in a weekend, here’s what I’ve learned from that failure and from watching friends and readers build their own: the best projects are the ones with a simple frame, one good material, and a clear plan for how the thing attaches to the wall or the bed.
A headboard changes a bedroom faster than almost anything else you can build, and it usually costs a fraction of what a store-bought one does.
I’ve put together twelve ideas, from a beginner-friendly upholstered panel to a cane headboard and an arched shape that looks harder than it is. Each one gets its own section with the materials, the honest trade-offs, and where people tend to go wrong.
I’ve also included a comparison table, a breakdown of tools and cost, and an FAQ at the end, because the same questions come up every time someone starts a DIY bed headboard project.
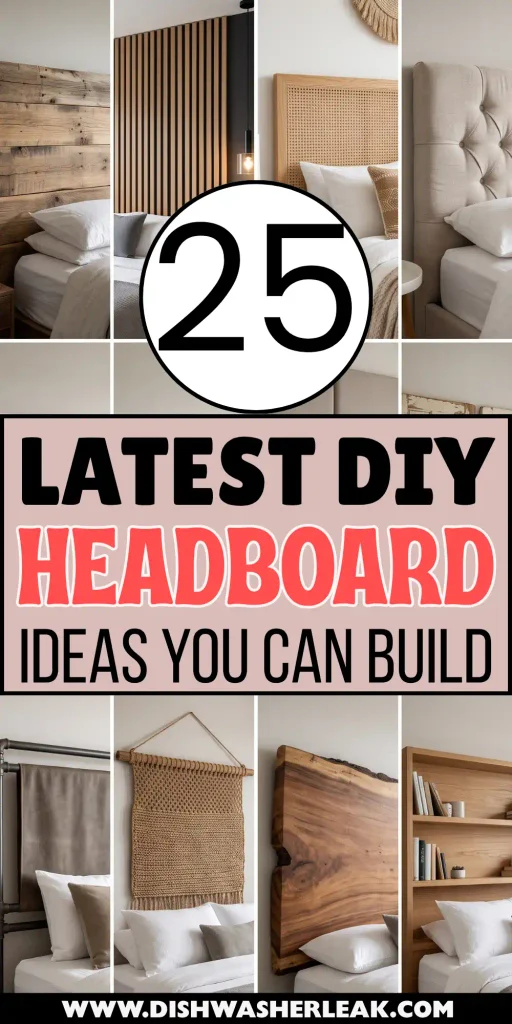
Quick Comparison: Which DIY Headboard Fits Your Skill Level and Budget?
| Headboard style | Typical cost (queen) | Build time | Skill level | Renter-friendly? |
|---|---|---|---|---|
| Upholstered panel | $60–$150 | 3–5 hours | Beginner | Yes, if freestanding |
| Plank wood | $60–$200 | 4–6 hours + finish drying | Beginner | Yes, if freestanding |
| Vertical slat | $70–$180 | 5–7 hours | Intermediate | Usually no (wall mounted) |
| Painted wall shape | $15–$40 | 2–3 hours | Beginner | Only with landlord approval |
| Cane or rattan | $60–$140 | 5–7 hours | Intermediate | Yes, if freestanding |
| Curtain headboard | $40–$120 | 1–2 hours | Beginner | Yes, with a tension rod or freestanding frame |
Costs are rough ranges based on what friends and readers have told me they spent. Lumber and fabric prices swing a lot by region, so check your local store before you commit.
Before You Build: Sizes, Tools, and Where to Save Money
Every good DIY headboard starts with measurements. The headboard should be at least as wide as your mattress, and I like it about 4 to 8 inches wider on each side for a more finished look. Standard mattress widths are roughly 38 inches for a twin, 54 for a full, 60 for a queen, and 76 for a king, so a queen headboard often lands in the 64 to 72 inch range. For height, most people go somewhere between 12 and 24 inches above the top of the mattress, and taller if you want a more dramatic look.
For tools, you can do most of these projects with a drill, a saw (or have the store cut your boards), a staple gun, a tape measure, a level, and a stud finder. A sander helps for wood projects, and a jigsaw is only needed for the curved and arched ideas.
Pro tip: Ask the hardware store to make the cuts for you. Most big-box stores will make a few straight cuts on plywood or boards for free or a small fee, and it saves you a lot of time and an awkward car ride.
1. Simple Upholstered Panel Headboard
This is the easiest way to get a soft, finished look, and it’s what I’d recommend if you’ve never built anything. The problem it solves is that a bare wall behind the bed looks unfinished, and a padded panel gives you something comfortable to lean against while reading.
Cut a piece of 1/2 inch or 3/4 inch plywood to size, cover it with 1 to 2 inches of foam or a few layers of batting, wrap it in fabric, and staple everything to the back, pulling tightly and working from the center out. Attach it to the wall with a French cleat or set it on a simple frame with legs.
The trade-off is the fabric. Light colors show every fingerprint, and a fabric that isn’t tightly woven can pucker. Choose a medium-weight upholstery or canvas fabric, and consider spraying it with a fabric protector.
Pro tip: Foam is flammable, so buy foam that’s labeled fire-retardant or use polyester or cotton batting instead, especially in a bedroom.
2. Reclaimed-Look Plank Wood Headboard
A wood plank headboard adds warmth, and it hides a lot of small mistakes because the natural variation looks intentional. It’s a good pick if your bedroom feels cold or a bit too polished.
Use 1×6 or 1×8 boards cut to your headboard width, sand them, and stain or paint them. Lay them flat on the floor, screw two cross braces across the back, and add a cleat for mounting. If you want a weathered look, apply a diluted gray stain, or brush on a mix of black tea and steel wool soaked in vinegar for an aged effect.
A word of caution about pallets: a lot of people turn to them for “free” wood, but you need to know what’s on them. Look for a stamp with the letters HT, which means heat-treated, and avoid any with MB (methyl bromide) or stains and odors. New lumber costs more but takes the guesswork out.
The other trade-off is drying time. Stain and sealant need real time to cure, so start your project on Friday evening, not Saturday afternoon, if you want to sleep next to it on Sunday night.
3. Modern Vertical Slat Headboard
Slat headboards have become one of the most popular looks in modern bedrooms, and they’re easier than they seem. They add texture and a bit of drama without adding much bulk.
Cut 1×2 or 1×3 boards to length, sand them, and stain or paint them. Attach them to a plywood backer with wood glue and small brad nails, leaving even gaps of about 1/2 inch to 1 inch. A spacer, such as a scrap piece of wood, keeps the gaps consistent. Painting the plywood backer dark underneath makes the gaps look deeper and more intentional.
The trade-off is the amount of sanding and finishing. Every slat has four sides, so it takes more time than you’d expect. Finish the boards before you attach them, because it’s much harder to stain between them once they’re glued down.
4. Painted Headboard Shape Directly on the Wall
If you don’t want to build anything, you can paint a headboard on the wall. It costs the least, takes a few hours, and there’s nothing to lift or hang. It’s also a great option for a rental, as long as your landlord has approved painting.
Use painter’s tape and a level to mark out a rectangle, an arch, or a rounded shape behind the bed, then paint it in a bold or contrasting color. Choose a high-quality painter’s tape and press the edges down firmly, then peel the tape while the paint is slightly wet for the sharpest lines.
The trade-off is that you’re committed to the wall. If you move or repaint, you’ll have to cover it, so choose a color you won’t get tired of, and if you’re renting, get approval in writing.
5. Shiplap-Style Headboard
Shiplap gives you a clean, farmhouse-inspired look without needing to cover a whole wall. A headboard-sized panel is far more manageable than a full accent wall, and it’s a good way to try the style before committing.
Use thin plywood strips, or pre-cut shiplap boards, and attach them horizontally to a plywood backer, using a nickel or a small spacer for consistent gaps. Paint the whole panel in one color, and caulk any seams for a smoother finish.
The main mistake here is ignoring the level. A slightly crooked board at the bottom multiplies as you go up, so check each row as you go.
6. Button-Tufted Headboard
Tufting looks luxurious, and it’s within reach for a patient beginner. It works best in a bedroom that could use a bit of softness or glam.
Start with a plywood panel, mark a grid or diamond pattern, and drill holes at each point. Add thick foam and batting, pull the fabric over, and use upholstery buttons and strong thread or twine, pulling through each hole from the front and stapling at the back. Work from the center outward so the pleats fall evenly.
Honestly, this one takes longer than a weekend if you rush it, and the first few buttons will be uneven. Give yourself time and expect to redo a couple.
Pro tip: Use a wide-eye upholstery needle and waxed thread. Regular thread breaks under the tension, and it’s demoralizing to lose a button at midnight.
7. Cane or Rattan Webbing Headboard
Cane headboards are a favorite of mine because they look expensive and are more forgiving than upholstery. The texture adds a relaxed, natural feel, and it works with almost any style from boho to modern.
Build a simple wood frame (or use a cut piece of plywood with the center cut out), soak the cane webbing in water for about 20 to 30 minutes so it becomes pliable, and staple it tightly over the opening. As the webbing dries, it tightens and becomes taut. Finish by covering the raw edges with a thin wood trim.
The trade-off is that cane can be fragile if you lean back forcefully or if you have pets that scratch. If you’re a heavy reader who props up with pillows, consider a plywood backing behind the cane for extra support.
8. Fabric-Wrapped Headboard With a Built-In Shelf
If you have a small bedroom without room for nightstands, a headboard with a shelf is one of the smartest projects you can build. It gives you a spot for a phone, a lamp, and a book without taking up any floor space.
Build the base panel the way you would for an upholstered headboard, then attach a narrow ledge, about 4 to 6 inches deep, across the top or at nightstand height, using wood glue and screws through the back. Cover the shelf with matching fabric or leave the wood exposed for contrast.
The trade-off is weight. A headboard with a shelf can be heavy, so mount it into wall studs, or attach it firmly to the bed frame, and don’t overload the ledge.
9. Fluted or Half-Round Dowel Headboard
Fluted wood detailing is one of those looks you see everywhere in high-end design, and you can copy it with half-round dowels, which are inexpensive and available at most hardware stores.
Attach the half-round pieces vertically on a plywood backer, side by side with no gaps, using wood glue and brad nails. Sand, prime, and paint them in a single color for a subtle but sculptural effect. A warm white or soft green looks especially good.
Painting takes patience because you need to get into the grooves. Use a small brush or a sprayer for a smooth finish, and expect two thin coats to look better than one thick one.
10. Peel-and-Stick Wallpaper Panel Headboard
This is a clever way to get a patterned headboard without a wall commitment. Cover a plywood panel with peel-and-stick wallpaper, and you get bold color or pattern in a piece you can take with you when you move.
Cut the plywood, wipe it clean, apply the wallpaper smoothly from one edge with a squeegee, and wrap the edges around the back. Add a simple wood or painted border for a picture-frame effect.
A tip I learned the hard way is to buy a bit more wallpaper than you need. If a corner bubbles or the pattern doesn’t align, it’s much easier to fix with a spare piece than to reorder.
11. Curtain or Drapery Headboard
This is the fastest project on the list, and it’s perfect for renters. A wall of fabric behind the bed makes the whole area look designed, softens noise, and can hide an ugly wall or a window behind the bed.
Mount a curtain rod, or use a tension rod if the space allows, and hang floor-length curtains or a wide piece of fabric behind the bed. Keep the rod slightly wider than the bed for the best effect, and choose a heavier fabric that hangs well, like linen or velvet.
Keep it away from candles and heaters, and make sure the curtain rod is firmly secured, especially if you sit up against it in the evening.
12. Arched Plywood Headboard
An arched headboard is the show-stopper of the list, and it looks more complicated than it is. The curve adds softness to a room full of straight lines, and it works either painted, upholstered, or covered in wallpaper.
Draw the arch with a string and pencil: tie a string to a pencil, fix the other end at the center point, and swing it to draw a smooth curve. Cut along the line with a jigsaw, sand the edges, and finish as you like. Cutting curves takes a steady hand, so go slowly and let the blade do the work.
The main trade-off is transport and storage. A large arched panel is awkward to carry and doesn’t fit through every stairwell, so measure your doorways and consider building it in two pieces if needed.
How to Attach a DIY Headboard Safely (Wall-Mounted vs. Freestanding)
This is the step I skipped on my first try, and it’s the one that matters most. There are three main ways to secure a headboard:
- Wall-mounted with a French cleat: Two interlocking strips of wood, one on the headboard and one on the wall, screwed into studs. It’s strong and neat, and the best choice for heavy headboards.
- Attached to the bed frame: Many bed frames have pre-drilled holes for a headboard. Check yours before you build, since it will determine your dimensions.
- Freestanding with legs: Add two wooden legs to the back of the headboard and slide it between the mattress and the wall. It’s the most renter-friendly, though the legs need to be sturdy and wide enough to stay stable.
Whichever you choose, use a stud finder and don’t rely on drywall anchors for anything heavy. A large headboard falling on you in the middle of the night isn’t just embarrassing, it’s a real injury risk.
How Much Does a DIY Headboard Cost Compared to Buying One?
Here’s a rough breakdown based on what I’ve spent and what friends and readers have shared:
- Budget build ($15 to $60): Painted wall shape, a simple curtain, or a basic plank panel using inexpensive lumber.
- Mid-range build ($60 to $150): Upholstered panel, slat, cane, or shiplap with decent materials.
- Higher-end build ($150 to $300+): Tufted, arched, or built-in-shelf designs using higher quality fabric, hardwood, or a lot of trim.
For comparison, a store-bought upholstered queen headboard can run several hundred dollars or more, so the savings are real, especially if you already own some of the tools.
Common DIY Headboard Mistakes to Avoid
- Skipping the measurements. Measure your bed, wall, and any outlets or switches before you cut.
- Making it too short. A headboard that barely clears the pillow looks like an afterthought.
- Not planning the attachment. Decide how it will be secured before you start building.
- Forgetting drying time. Paint, stain, and sealer need time, so plan them for the first day.
- Using heavy materials without stud support. Weight adds up fast, especially with solid wood.
What I’d Do First If I Were Starting Over
I’d start with the upholstered panel or the plank headboard. Both are forgiving, both look good even when they’re not perfect, and both teach you the basics of cutting, finishing, and mounting. I’d measure twice, decide how to attach it on day one, and give the finish plenty of time to dry.
Whichever of these DIY headboard ideas you choose, remember that a weekend is enough to change a bedroom, but only if you plan the boring parts first. The rest is just the fun part.
FAQs About DIY Headboards
How long does it take to build a DIY headboard?
Most simple headboards, like an upholstered panel or a plank wood design, take between 3 and 7 hours of hands-on work. Projects that involve stain, paint, or sealant need extra time to dry, so it’s smart to start on Friday evening if you want it done by Sunday.
What is the cheapest way to make a headboard?
Painting a headboard shape directly on the wall or hanging a curtain behind the bed are the lowest-cost options, often under $40. A basic plank headboard from inexpensive lumber is also budget-friendly.
How high should a DIY headboard be?
A common range is 12 to 24 inches above the top of the mattress, though taller headboards create a more dramatic look. Sit up against the wall with your pillows before deciding, since you’ll want it to be comfortable for reading.
How wide should a headboard be for a queen bed?
A queen mattress is about 60 inches wide, and many people build the headboard between 64 and 72 inches wide so it extends a few inches beyond each side. Measure your own mattress, since sizes vary slightly by brand.
Can I make a DIY headboard as a renter?
Yes. Freestanding headboards with legs, curtain headboards on a tension rod, and panels that lean against the wall don’t need any holes. Check your lease before you paint or drill anything.
What is the best fabric for an upholstered headboard?
Medium-weight upholstery fabric, canvas, or a tightly woven linen blend is a good starting point because it stretches evenly and holds up to leaning. Avoid very thin or stretchy fabrics, which can wrinkle or pucker.
Do I need special tools to build a headboard?
For most of these projects, a drill, a staple gun, a saw, and a tape measure are enough. A jigsaw is only needed for curved designs, and many hardware stores will cut your boards for you.
How do I attach a headboard to the wall without damaging it?
The most secure method is a French cleat screwed into wall studs, which does leave small holes. If you can’t drill, a freestanding headboard with legs, or one attached to your bed frame, avoids wall damage altogether.


Leave a Reply